Christmas Wall Tree for Tiny House
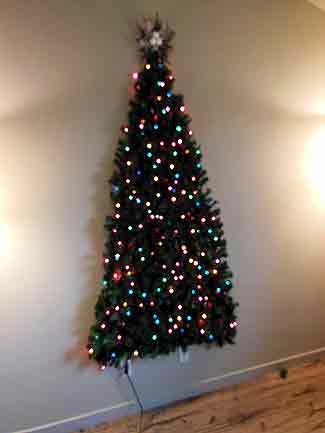
We have no room for a Christmas tree in our tiny house so we found a ‘Wall Tree’ on YouTube® to make and thought we’d give it a try. Here is our experience. Progress pictures in the slider to the right.
Materials to make a Christmas Wall Tree
- Garland, 9′ , Qua. 6
- Christmas lights, 3 strings of 100 bulbs
- 3M, Command Hooks®
- Glue Dots, Flexible Hanging Tabs®
- One large picture hook
- Blue or green painters tape
How to Construct a Christmas Tree on the Wall in your Tiny Home
-
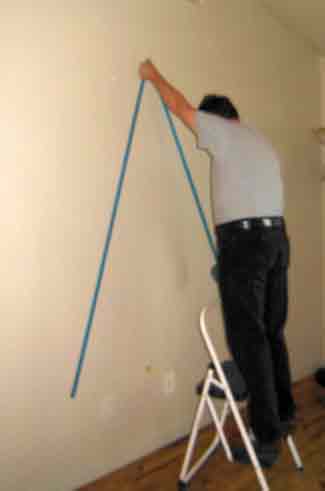
- Layout the Christmas tree shape on the wall with painters tape. See the picture of the slide show for example.
- Nail in the large picture hook at the top of the tree. It will bear most of the weight of the garland.
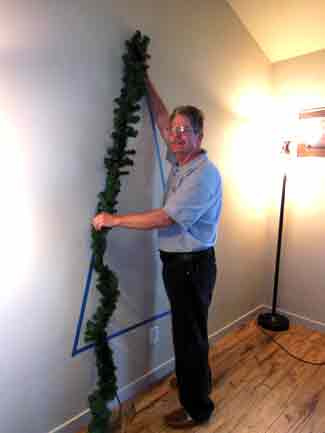
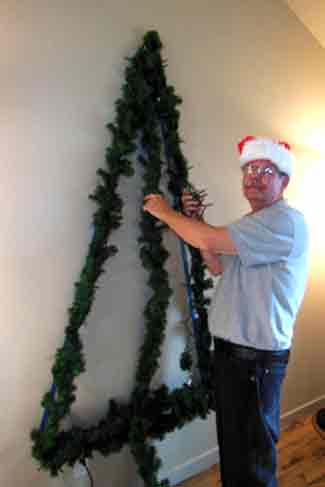
- Attach the first garland to the picture hook. I wrapped the garland with the lights as I went because I thought this would be easier than trying to string the lights on after the garland was hung.
- Use the Glue Dots hang tabs to affix the garland to the wall using the tape as a guide. Once you’ve have outlined the tree remove the tape.
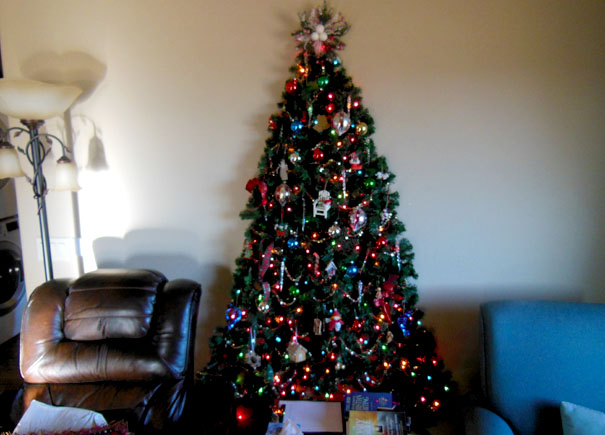
- Attach the second garland to the first and continue wrapping with the lights. Fill in the center of the tree. Use a 3M Command® hook at the top of each garland to bear the weight. Our tree is 5′ high and 3′ wide. We used five and a half 9′ lengths. I cut off the extra with a wire cutter. The lights came out just right.
- Fluff the garland (takes forever) to look like real branches, then add your favorite decorations. My wife has the artistic skill for that part.
We added a star on the top (also from Walmart®) using a 3M Command hook®. After cleanup, we slid the furniture back into place so the tree is safe from our dog and the grandkids can’t get to it.
YouTube® videos frequently make things look easier than they are. In our case, this was four hours of hard work. The next day many of the GlueDots® had let loose. I replaced them with the 3M clips and it’s holding now.
The Second Year
The second year I assembled our wall Christmas tree I did it a little differently.
I used the large picture hook at the top and the 3M Command Strips on each lower corner, but then I filled in the tree by twisting the branches of the garland to the adjacent strand instead of hooking each strand to the wall.
I did not use the painters tape as a guide, though I probably should have.
I somehow ended up with extra in the middle, so I laid it over the top of the other garlands. This added a sense of depth to an otherwise flat tree. My wife thinks it looks better than ever.
If you’re not handy

If you’re not handy and feel you do not have the ability to make your own wall tree, you can buy one already made from Amazon.com.
This one shown comes pre-lighted and was under $50.00. The size is: 27.56″D x 6.69″W x 4.33″H. Click on image to see details.
Note about our Nativity Scene
The nativity scene used as the top photo is something we threw together as a way to use a small, narrow loft that’s relatively inaccessible. We do not have a space for our tabletop nativity scene. I ordered the metal manger scene from eBay and the trees and lighting came from Walmart. The nativity scene we used is no longer available, but click on the photo to see a very similar one from Amazon.





Leave A Comment