Dealing with moisture in an RV, Travel Trailer, or Motor Home
This post deals with the problem of too much moisture and condensation in your RV, travel trailer, or motor home. We have a page about moisture issues in a Tiny Home, but your RV has constraints specific to RV construction that will be addressed more directly here.
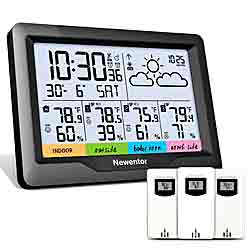
RV interiors should be between 30% and 50% to prevent mold and mildew growth. Use a clock with a humidity sensor to keep track of this.
In the warm summer months you can just open the windows, but in the winter this moisture condenses on any cold surface and becomes a real issue.
Excessive moisture is a major issue because toxic black mold can grow quickly in this environment. Too much moisture will cause a host of structural issues like delamination and dry rot. The building materials can literally degenerate into a useless mess. See what you can do to repair that on this page: How to Repair and Remodel and RV. Checkout mold control products here.
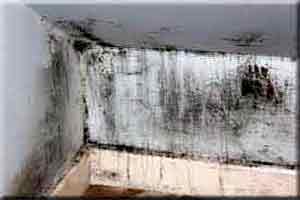
The picture at the top of the page shows mold that grew between the mattress and the outside wall. See what to do about it below.
The Newton weather station shown here has four sensors you can place throughout your unit, even underneath.
Two options for moisture control
There are only two things to do to prevent condensation due to excessive moisture in a tiny enclosed space.
- Stop producing moisture.
- Remove the moisture from the space.
Stopping Moisture At The Source
Step One in ending your moisture issues is to stop the moisture at its production source. This is easy in the case of house plants. Just get rid of them. But other moisture producers like YOU can not be reduced so venting is the only option left.
Moisture producers
Condensing what most sources say, YOU, either thru respiration or perspiration, expel about a pint of moisture while you sleep and about twice that during the day. I’m not going to ask you to wear a snorkel attached directly to a dehumidifier, so stopping this source of moisture is off the table. But there are several other moisture producers that you can take steps to reduce.
- Showering and bathing

- Laundry (especially if you have a combo or unvented dryer)
- Cooking and any open propane flame
- Your respiration and perspiration
- Leaks (roof leaks or by slide-outs)
- House plants
- Outside air in some areas is very humid
- Snowy (or wet) boots and clothing
Showering is the #1 moisture producer in an RV
If you’re full-time in an RV park, the easiest way to deal with shower moisture is to just shower in their facilities. If that’s not an option, here are some other ideas:
A UK company developed a plexiglass lid for the shower enclosure to contain the moisture. It does do that, but eventually that moisture is going to have to go somewhere or mold will start growing in the shower stall. Use a small squeegee to wipe the moisture off the wall and enclosure so it drains faster.
Another good option is to have a roof vent with a fan directly over the shower area (it’s usually over the commode).
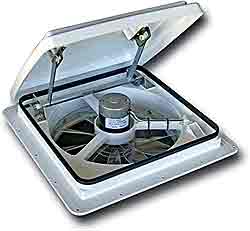
The vent fan shown here has a good-sized 10″ fan that uses the entire opening to create a good suction. Control fan speed, thermostat and air intake/exhaust on the flush-mount ceiling keypad. Long-life, sealed ball bearing 12-volt fan motor moves over 900 cubic feet of air per minute, quickly and efficiently pulling fresh air in and removing hot, stale air and odors. Fits all standard 14” x 14” roof openings. Click on image to see more details.
The problem is that we often turn these vent fans off way too soon because they’re noisy or we’re worried about using up our batteries. Or we might be worried about forgetting to turn it off or about losing all of the heat in the RV. All valid concerns. But we end up turning it off way before the humidity levels are reduced.
You already have a vent in the bathroom
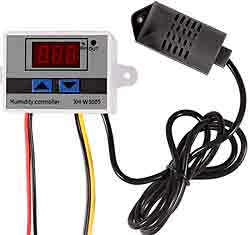
If you have a vent in the bathroom it’s probably fairly close to the shower already.
Add the moisture sensor shown here to keep the fan running until moisture levels go down to normal. The Digital LED Humidity Controller Module, Hygrometer Switch with Humidity Sensor can control the 12 volt fan and keep it running until the desired humidity level is reached. Only $12.50.
It may take some ingenuity, but find a way to mount the programmer part on the wall and the humidity sensor near the ceiling.
It’s important to also have an air intake area into the bathroom. The door in my RV has almost a two inch gap at the bottom to allow air movement. If your bathroom door doesn’t have this gap consider cutting a vent into the door.
Preventing Moisture While Doing Laundry
You like doing laundry at home. That’s why you have a washer/dryer.
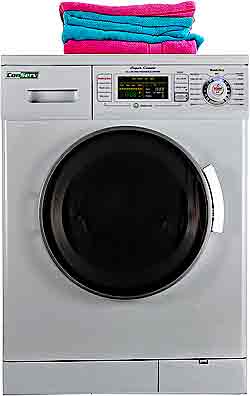
Did you know that the washer/dryer combo units are non-vented? They work by condensing the moisture in your clothes and sending it down the drain. That’s one reason it takes so long to do a load of laundry and why your clothes come out feeling slightly damp. People have a tendency to hang clothes around their rig until they are completely dry. This is fine in the summer when the windows are open but not so much in the winter.
The washer/dryer combo by CONSERV shown here is the only combo unit that as a vented option. When vented, the drying is much faster and more complete. It has a winterizing feature to keep it from being damaged if stored thru the colder months, and a “quiet” option which keeps it below 60 db when spinning. Click on image to see more details. Click here to visit my page about “Doing Laundry In A Tiny Home“.
Properly Venting Moisture-Laden Air From Your RV
Most RVs, no matter how fancy, do not do a good job of venting moisture laden air. Maybe they assume you’ll only be using your rig during the nice summer months when you can just open the windows and vents. But more and more people are living in their RVs full-time.
Cooking produces moisture
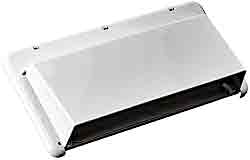
This vent consists of an attractive exterior vent cover designed to keep rain and dust out of your vehicle with an outside manual release damper.
 Moisture from cooking is not just from the pot of boiling water on the stove. It’s from the propane combustion. Propane combustion creates one lb. of moisture for every two lbs. of propane burned. There’s also the issue of low level carbon monoxide to deal with so adequate venting is extremely important.
Check to see if you have a range hood and if it’s vented outside or just recirculated. Mine was just recirculated. I replaced it with this vented range hood from RECPRO. It’s 12 volts and also needs an external vent with cover installed.
Install an external vent cover that can be locked closed when traveling so you don’t get dust and fumes coming in. The range hood shown here does that. Click on image to see more details. You do need to remember to latch it closed before traveling, then unlatch it at your destination.
Change to an Induction Cooktop If You Have Electricity

Induction stoves rely on cookware to heat, so it’s essential to choose magnetic bottom cookware with a minimum diameter of 5 inches. Cooktop will not operate without compatible cookware, but, they do not produce any moisture like a gas stove does.
This Duxtop 9620LS LCD Portable Double Induction Cooktop measures 17.1″ x 25″ inches and weights under 15 lbs. It uses 1800 watts of power at most.
Adding “make-up” air
Combustion not only produces moisture and deadly gasses: it uses up the oxygen in the room. That’s why you see warning signs in your RV to not run the stove without opening the vents or door or both. Add a make-up air damper under the gas range, maybe behind the oven. There are some that open automatically when the range hood is turned on. See more about those on this page.
Visit this page of my website to learn more about providing make-up air: Properly Venting A Tiny Home
Visit this page to see a very informative video about make-up air and your gas range.
Combustion produces Moisture
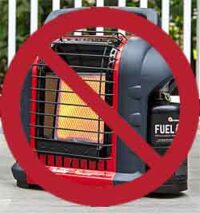
For these reasons NEVER USE AN UNVENTED PROPANE HEATER INSIDE. Propane heaters like Mr. Buddy will produce low levels of carbon monoxide. Levels below what your basic carbon monoxide detector will sense. Read more about the dangers of low-level carbon-monoxide poisoning here.
Bringing in fresh air without losing the heat
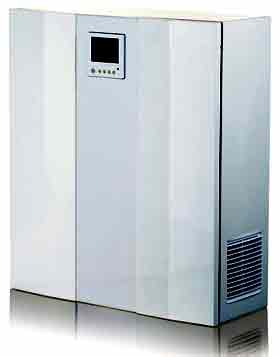
Full-time RVer’s work especially hard to stay warm in the winter. Bringing in outside air would mean losing valuable heat unless you use and HRV (Heat Recovery Ventilator).
The Vents-US , Micra 60, Sing Room Heat Recovery Ventilator (HRV) is a permanently installed RV air exchanger that continuously removes stale air from the interior of your RV and replaces it with fresh air from outside. Shorten the time for outgassing of construction material toxins (formaldehyde) in new RV’s all the while maintaining higher interior air quality. The passing air flows do not mix while traveling thru the HRV, so the fresh air stays fresh. The HRV unique design helps transfer the temperature of the outgoing interior air to the incoming outside air to help maintain a comfortable temperature in the living space. $1,215.00* from HVAC Direct. Click on image for details.
See more details about venting on this page: Properly Venting a Tiny House
Some HRVs need some ducting. This may take a little doing, but it can be incorporated into the ducting of your HVAC system if you have one. That will help disperse the dry air throughout the structure. See more about ducting on this page: https://tinylifeconsulting.com/best-ways-heat-tiny-home/#ducts
Energy Recovery Ventilator
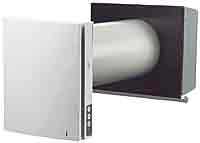
TwinFresh Expert RA1-50-2 designed to ensure filtration and supply of fresh air into the room as well as exhaust of stale air with energy regeneration. No freezing and condensation during operation. Efficient supply and exhaust single-room ventilation air flow up to 30 CFM. Get fresh, dry air and keep the heat.
Upgrade your indoor air quality with the TwinFresh Expert RW1-50-2 Wi-Fi, the advanced wireless version of our popular TwinFresh Expert Ductless ERV system. Designed with convenience and efficiency in mind, this unit allows full control from your smartphone or tablet, whether you’re across the room or across the country, using the Vents Home App for Android or iOS.
It was designed for tiny homes with a wall width of 5.5″ so you’ll need to get creative during the insulation. It requires 110 volts AC.
Remove Moisture in an RV with A Dehumidifier
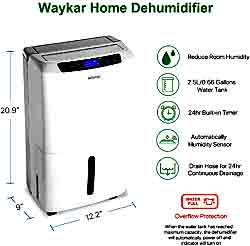
This seems like a no-brainer, but a little ingenuity is needed to make a dehumidifier work properly. The dehumidifier works by pulling in air past a cooling coil where it condenses and drains into a catchment area. See the widget column for good dehumidifier choices.
The Waykar dehumidifier shown here is frequently chosen as the best in studies and comparisons. It is a compressor type dehumidifier which does best in warm temperatures. It will remove as much as 34 pints a day and they do have bigger ones.
The Invation dehumidifier (shown on the right) is a “desiccant” type that does better in cooler locations, under 50° F. It’s perfect for crawl spaces, garages, and areas of your RV you might not heat. It uses a bit more energy than a compressor type dehumidifier.
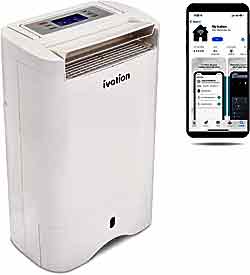
Because of it’s design it will gently warm the air as it works. They are quieter than a compressor style of dehumidifier and can bring the moisture level far lower than the 45% of a compressor type. It’s for spaces up to 410 sq/ft.
It’s also controllable from Your iPhone or Android! Download the My Ivation App to Power On/Off, Check Humidity, Room Temperature & Water Tank Status & Adjust Humidity & Fan Settings from Anywhere.
Get the air in your rig moving with fans
Dehumidifiers work great BUT: they only work if the moisture-laden air gets to them.
The small fans in most dehumidifiers pull in the air within a few feet of the device. Moist air will eventually move in the direction of the dehumidifier, but there may be many areas of your dwelling that have limited air movement. Air within cabinets, closets, adjacent rooms (even with the doors open) will not circulate to the dehumidifier. This creates micro-climates.
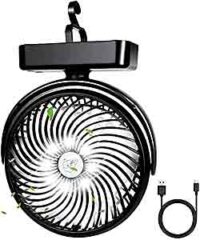
Use a number of fans to get the air in your rig circulating. Try to think “outside the box” and get creative with fans to reach all areas of your home. See some useful fans on this page. The fan shown here is rechargeable and runs for 70 hours per charge.
I use this fan. It will run for 40 hours per charge and the ingenious hook and clip give you options of hanging or clipping it anywhere.

Dealing With Condensation
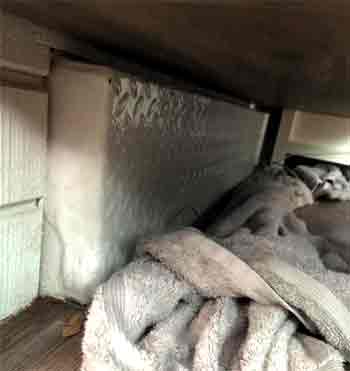
Humid air is not always a bad thing. The real problem is when the moisture condenses on a cold surface.
The windows are the place condensation is most noticed, but all exterior walls and surfaces are susceptible. This image is the wheel well under the jackknife sofa. By the time the RV owner noticed it, there was a solid half inch of ice covering it and floor damage had begun.
I would recommend replacing your windows with dual pane arctic windows but it doesn’t really help. It will keep you warmer if you are full-time living in a cold area, but moisture will still condense as in the photo above. It’s best to wipe the windows every morning with an absorbent cloth to remove the condensation.
But in hidden areas, like under the jackknife sofa, you need air movement from a fan as well as insulation.
Vent Closets and Enclosed Spaces
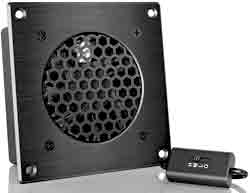
Are your cloths beginning to smell musty? Does the cabinet under your sink smell funky? These are perfect breeding areas for mold and mildew. Enclosed cabinets are cooler than the rest of the RV especially if the are against an exterior wall. Moisture condenses here.
The easiest thing to do is leave the cabinet doors open or even take them off. Or, you could add a small fan on the side to bring dry air in and a vent to the door to let moist air out.
The vent shown here was designed to vent cabinets packed with hot audio components but it’s perfect for getting air moving in any cabinet. It works on 12 volts.
Add insulation
Add insulation to the back of closets, cabinets, and under built-in furniture. Not only will you be warmer but you’ll cut down on the areas condensation can form. See more clever ways of adding insulation on this page.
Venting around your mattresses
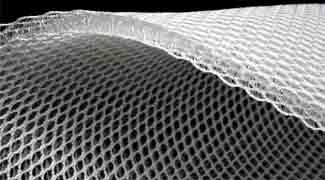
As we see in the picture at the top of the page, it’s important to vent under your mattress and also between the mattress and a cold exterior wall. During the night you release about a pint of moisture into the mattress and bedding. This eventually permeates the mattress and condenses on any cold surface.
Condensation = mold. An anti-condensation underlayment is essential for proper airflow to remove the moisture.
If your bed does not have a frame or a raised area underneath allowing airflow, install a “Anti-Condensation Mattress Underlay.”
HyPUR-Flow, shown here, is designed to prevent moisture build-up underneath your mattress. It will elevate your mattress about 1/2 inch to create unobstructed air flow which will help prevent condensation & moisture, keeping the bottom of your mattress dry, while allowing any potential moisture to evaporate.
See methods of eliminating mold in this blog post: Eliminating Mold and Odors in Your RV or Tiny Home
Change your bedding to wool
Change your blankets to wool. Not only will you be warmer, but wool wicks moisture away from you and stays warm even when damp.
See this page for the best bedding and mattresses: Best RV and Tiny House Mattresses.
Wood Stoves Create a Drying Heat, Removing Moisture in an RV
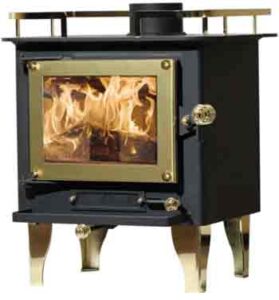
If you have a place for one, a wood stove is fantastic at drying out the environment. There are some very tiny wood stoves that are safe to use in an RV. See my page, Wood Stoves for Tiny Abodes.
Also see: Wood Stove Is It Safe To Use In An RV





Leave A Comment