![]()
RV Winter Living, How To Prepare Your RV/Travel Trailer
Here are some great ideas to help those living full-time in an RV/travel trailer in cold climates. RV winter living presents some unique challenges due to the shortcomings of RV and travel trailer design.
In this post you’ll find ideas, instructions, and illustrations designed to help protect both you and your rig from freezing temperatures and their subsequent complications.
Exterior:
Protect water lines and holding tanks from freezing
Types of skirting, an absolute essential for RV winter living
Warm Air In, Cold Air Out
We’ll be examining each situation in depth; however, there are two main elements in successful RV winter living:

- Adding more insulation.
- Producing more heat.
-
- You will be using a lot of propane for your heater. Contact the local propane dealer. They will usually bring around a large tank and connect it to your RV system. Every month they’ll come around and refill it. This is less expensive and easier than bringing your smaller tanks to a refill station.
- See this page, “Best Ways To Heat Your Tiny Home or RV” for more information on heating your space.
-
Exterior: Water System, Batteries, and Skirting

Protect water lines from freezing
Visit our page, Prevent Freezing Water Lines in Your Tiny House, for detailed information about this important aspect of full-time RV Living. There is also information on this page about holding tank heaters and propane tank blankets.
If you live in an area where freezing temps are rare but an arctic blast is imminent, fill your fresh water tank and disconnect the water hose. Drain the water out of it and leave it on the ground until temps warm back above freezing.
Protect holding tanks from freezing
Normally you don’t need to worry about your holding tanks freezing but during really cold snaps you might want to be proactive about freezing. There are holding tank heaters that can be added if you’re thinking ahead, but if you find yourself hitting a rare cold snap for your area, here are some temporary things you can do to get your thru to warmer temps:
- Add a few ounces of RV antifreeze to the gray and black tanks.
- If you can’t get any RV antifreeze you could add a cup of salt to each tank. Just pour down the kitchen sink drain and the toilet with a bit a water.
- Your fresh water tank is usually in a heated area. Make sure it’s filled. It would take quite some time to freeze that much volume of water.
Wet Bay
 If you have plumbing in a storage area under your trailer, keep an eye on the temperature with a remote thermometer. Keep a small ceramic heater in the bay that you can plug in if needed.
The Mini Ceramic Heater shown is just 400 watts which should be just right for a small enclosed space. It’s very small and basic. You could couple it with the Thermo Cube Thermostatically Controlled Outlet (shown in the sidebar) to make it more automatic. It would only be needed on really cold nights.
Keep Your Battery Warm
A lead/acid battery charge will not last as long in cold weather. My battery is in a sealed box under the jackknife sofa so it stays at room temperature. But many of you have your battery in a non-heated, or barely heated, storage bay. There are many types of battery warmers but they all use energy which may negate their usefulness.
Lithium batteries will discharge normally between a range of -20F and 120F so it should be good in the winter. However, manufacturers do not recommend charging lithium batteries below freezing. Some lithium batteries come with an internal heater. If you have very cold winters, choose your batteries with this in mind.
If you have solar panels they will keep your batteries active enough so their core does not go below freezing.
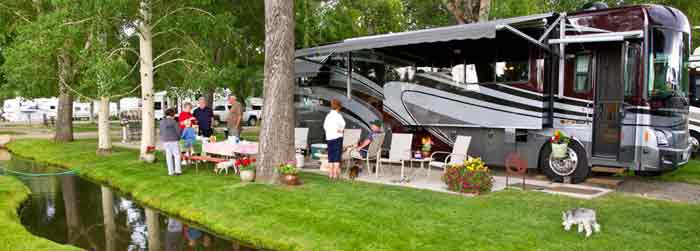
Skirting is a Must for RV Winter Living
 Many RV parks require skirting for long term stays to make the park look nice, but the reason you want skirting during the winter is far more important. You need to stop wind from blowing under your RV or travel trailer. While non-moving air is a great insulator, moving air will blow away any heat.
Even 4-season RVs are not well insulated. Water pipes, holding tanks, and sewer lines below the floor are not insulated at all. The more you can stop the air from moving under your RV, the warmer you will be and the fewer problems you will have with freezing water lines.
People have made skirting from hay bales, foam board, even snow. One friend made some nice skirting using tongue and groove planks over foam board. See her Facebook® pictures here.
Hay bales are awesome mouse habitat so we don’t recommend using them.
Fabric skirting
Fabric Skirting can be made from canvas, tarps, plastic sheeting, and recently old billboard vinyl.
There are many companies who sell vinyl fabric skirting specifically for RVs. Most need to have hundreds of snaps installed along the lower edge of your rig. There is one company that offers stick-on snaps.
They are held in place along the bottom with sandbags, rocks, or tent stakes. No matter how securely it’s installed, fabric or vinyl skirting will flap some in the wind. The air under your rig will also move, defeating some of the insulating properties.
Skirting costs money but you will save money on your energy costs.
Inflatable skirting

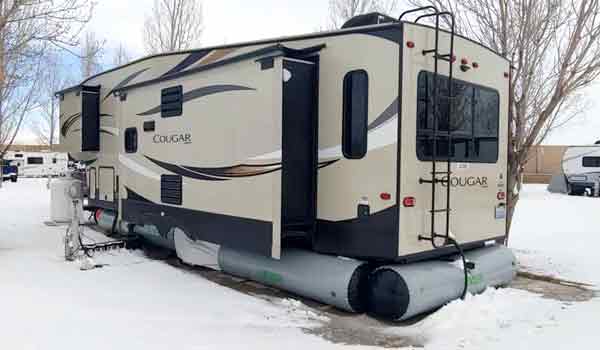
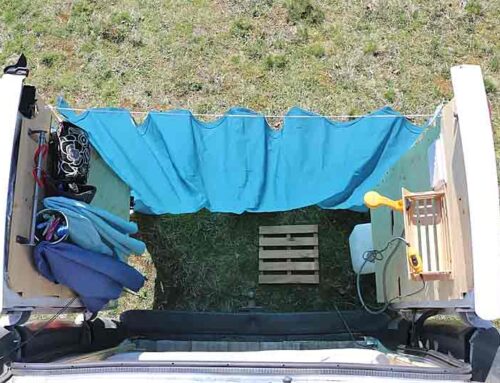
![]()
Shown at the top of the page is inflatable skirting from AirSkirts. This is the coolest invention since sliced bread. These sturdy inflatable tubes are made from the same material as a river raft. They can be installed in about fifteen minutes and make a tight seal offering great insulation.
 Because they fit tightly they will not blow away in the wind like foam board can. The air contained withing the inflatable tubes provides awesome insulation.
You can set the entire kit into place in about twenty minutes. You won’t need to drill hundreds of holes in your rig to attach snaps like some types of skirting.
Just tell the folks at AirSkirts the size or make and model of your rig and they send you all of the correct components. Each kit includes the inflation pump and a duffel bag to store it in.
The 16′ to 24′ kit costs $1,400.00. Compared to other types of skirting that’s not too bad.
RV Inspiration Blog

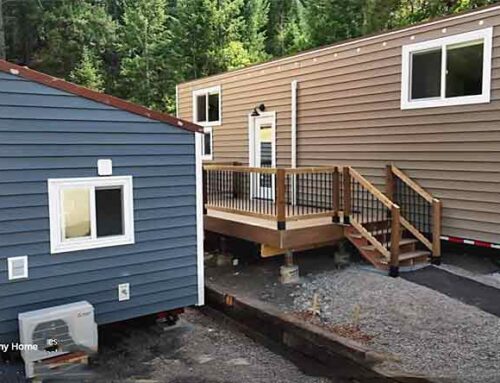
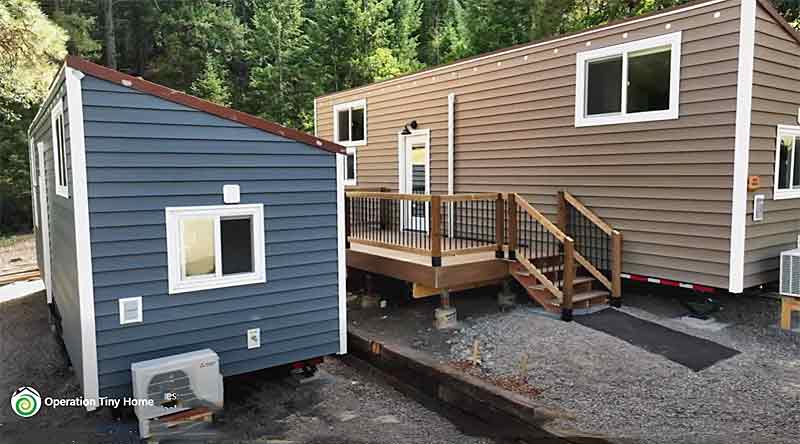
Ashley used black plastic sheeting for basic skirting the first year.
As is my custom, if someone else has great information already prepared on the subject I will give you the links. Ashley Mann and husband Josiah live in their 38′ 5th wheel near Kansas City. She has a great blog called RV Inspiration.
This photo shows her 5th-wheel the year they used plastic sheeting for skirting.
Here is a video she made using foam board for skirting because the park they stayed in did not allow plastic sheeting.
Ashley has lots of other good ideas on her blog for comfortable winter living. She recommends duct taping the foam board to the underside of the slide-outs too.
Ashley has created a professional quality course on Decluttering and Downsizing. Click on link to see details.

Insulated Slideout Wraps
Slideouts could use more insulation, especially around to top and sides. You can get insulated slideout wraps from The Skirting Company.
The insulated sideout wraps do not cover the underside of the slideout because water tends to collect there. Try using the foam board there for more insulation.
Also, jam the pipe insulation along the seams by the trailers sides to really close up that gap.
For more information on skirting see this page: Skirting for Tiny Houses, Travel Trailers, and RV’s
Interior: Insulation, condensation, creating more heat, windows/doors
Add insulation where you can for RV winter living
Insulation can take many forms. Anything that add thickness to a wall, floor, or ceiling can be considered insulation and make RV winter living more comfortable.

If you have a wood or vinyl floor add a thick runner or cozy rug where possible. A rug will create an extra layer of insulation and provide a warm barrier between your feet and a cold floor. Look for rugs with a high “stitch count,” also called a needle count. A higher stitch count means better insulation.
Wool rugs have the best insulating properties but require special cleaning and can be expensive.
Carpet padding can also increase the insulating value. Carpet padding comes in foam rolls and can easily be cut to size.
We have carpet floors and use Rag Rugs like the one shown here on top of that. Rag Rugs are durable, easy to clean, and they don’t get mashed down after being walked on. We have three different sizes to fit the different areas of our rig. The rug shown is hand made from 100 percent natural jute fibers. Click on image to see details.

Add Carpet Scraps Under Cabinets, Beds, and Jackknife Sofa
Check the dumpsters of a carpet and flooring store to get scraps of carpeting for free. It doesn’t need to match because it won’t be seen. Squeeze it under the bottom drawers of your cabinets, The floors of closets, under the bed and jackknife sofa.
Use these 4×8 sheet of cork to create insulation on your hard flooring surfaces and under rugs. It adds an additional 5/8″ of insulation. It also has a nice feel underfoot. Click on image to see details at Amazon.com
These are very inexpensive and are easy to install to any shape floor space.
Reflective Bubble Wrap Sheets Add Insulation.

Photo provided by Nancy Hudson. Used with permission.
Line the back of the cabinets with the bubble wrap foil shown in the widget section. Also line the storage compartments and closets. I use this reflective bubble wrap for the windows but only at night because it blocks out the light.
Put a layer of bubble wrap insulation on your door as this is one of the least insulated areas of your rig.
Are your wheel wells insulated?
Check your wheel wells (under your couch or jackknife bed). They may be totally uninsulated. Moisture will condense here then allow mold and water damage. Insulate with the 2″ thick foam board and duct tape all the seams so it’s as airtight as possible.
You could use a spray on foam if the temps are warm enough and you have good ventilation.
See also the insulated pillows for the roof vents.
Insulate Storage Compartments and Hidden Areas

George Bills reported a big difference when he insulated the storage compartment under the bed.
See this YouTube® video by RVStreet showing how to insulate a lot of hidden areas. He says, “In this RV, DIY video, I show several ways to keep your RV warmer using a variety of different RV heaters & insulating tips that I know 99% of you haven’t seen before. If you implement these RV insulation tips by protecting your wet bay & other areas in your motorhome or RV from freezing & eliminating cold air drafts from coming in like I did, you won’t have to worry about frozen pipes or other serious water issues when it gets really cold, & you’ll stay warmer inside.”

Convert your screen door into a storm door
Make your screen door a storm door so it holds air between the two doors creating more insulation.
Start by taping a piece of cardboard over the screen on the lower portion of the door. Use the Flex-O-Glass (shown here) or Frost King Shrink Window Kit to cover the screen on the upper part of the door.
The screen door doesn’t make a great airtight seal. but taking this step will actually help quite a bit by keeping a bubble of non-moving air between the two doors of your RV.
Make storm windows for more comfortable RV and less condensation
Warps Flex-O-Glass is thick but flexible. It’s a great product to use for adding an additional layer of insulation to the windows without blocking the sun.
Use 3M Outdoor Mounting tape to attach securely over windows on the outside of your rig. Make sure you leave the “weep holes” open.
Add an Insulated Door Curtain
Thanks to its three layer framework with waterproof Diamond polyester fabric cover and inner fluffy polyester fiber fill, this WochiTV thermal insulated door curtain is designed to keep your heat inside. It’s windproof, waterproof, and weatherproof. Helps save your energy bills and reduce outside noise!
Installs easily with no tools. Folds up compactly for summer storage.
For RV Winter Living Ashley recommends:

These Peel-and-Stick foam panels add insulation. They can flex to follow the contours of your rig. Ashley added then to the inside of the closets to add insulation in places you might forget about. Add insulation under the jack-knife couch, inside cabinets, and around the bed.

Under Rug Heater Radiant Floor Heater
Here’s a fantastic idea to warm just the area where you are. Now you can finally warm up spaces lacking heat. The Hot Carpet mat fits under carpet or your favorite area rug.
Your Woo Warmer plugs into any standard wall outlet. This heater will save you money on your heating expenses, offering mild electric radiant floor heat for a fraction of the cost of conventionally installed systems. To use the Woo Warmer, just cover it with any rug or carpet and plug it in. Hot Carpet is completely invisible and makes no noise. No carbon dioxide fumes. No fan noises or dust. It’s 72″ long, and 33″ wide and uses just 180 watts. It’s actually enough to warm an RV living area. Click on image to see details at Amazon.com. $179.85.
Dealing with condensation and moisture issues
With your RV sealed up tight you will be trapping a lot of moisture. It will condense on any cold surface including windows, between outside walls and mattresses, in cabinets, and wheel wells. Refer to this page for more information about dealing with moisture and condensation: Dealing With Moisture In An RV
Get the air moving
For your dehumidifiers to work the moisture-laden air needs to get to them. Add a fan or two to keep the air in your home moving around.
You might consider taking the doors off closets and cabinets so air exchange can take place.
See my page on “Properly Venting a Tiny House or RV,” for suggestions on unique fans and venting options.
Creating more heat for RV winter living

The propane heater that comes in a standard RV will have a hard time keeping up with really cold temperatures. The “far infrared” heater shown here mounts like a picture, plugs into 110 volt AC outlet and uses just 450 watts. You can put one in each room and network them together to heat your home most economically. See more details on this page: Best Ways to Heat Your Tiny Home
Even tho tiny houses are better insulated than RVs and travel trailers, the types of heating methods are the same. We have several pages on this website that cover ways to heat your tiny home that will work great in your RV.
Warning: Do not use free-standing propane heaters like Mr. Buddy. Here’s why.
Free-standing electric space heaters are fine if you have the power to run them.
Getting extra power from your park pedestal
Most likely you are plugged into the 50 or 30 Amp outlet on your RV Park Pedestal. Space heaters use lots of amperage so you’ll want to take advantage of the additional 20 amp outlet on the pedestal too. Run a separate, heavy gauge, extension cord from the 20 amp outlet into your RV as dedicated space heater power. Here is a great YouTube® video that explains it in detail.
Heating Your RV’s Underbelly
Look at the underside of your RV to see if you might benefit from adding a heater under there. See this page for details: Heating Under Your RV Is it worth it?
Other pages of Tiny Life Consulting you’ll be interested in:

Add a tiny wood stove. No electricity required and it provides a dry warmth eliminating moisture issues. Click on image to see more.
Dealing with Moisture in an RV
Heating Under Your RV Is it worth it?
Henry Tropi-Cool RV Roof Coating
Eliminating Mold and Odors in Your RV or Tiny Home
Keeping Your RV Cool This Summer
Buying a Used RV or Travel Trailer
Skirting for Tiny Houses Travel Trailers RV’s
RV Accessories You Can’t Live Without

Leave A Comment