![]()
Coating my RV’s Roof With Henry Tropi-Cool White Roof Coating
 To understand the full scope of RV roof care and repair, please visit our page How To Refinish or Repair Your RV Roof. The bonus page below is devoted to my personal experience with roof repair, and the product I finally found I believe is the best choice for refinishing one of the most common types of roofing material, EDPM.
Your RV’s roof is very likely made from Ethylene Propylene Diene Terpolymer, or EDPM. What they don’t tell you at the dealership is that EDPM roofs pretty much disintegrate over time. They ‘chalk off,’ turning into dust and washing off in the rain.
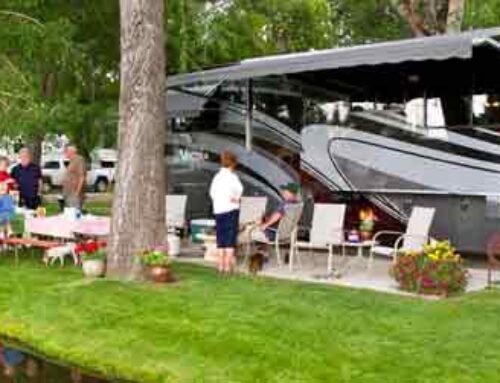
Our ’93 Chevy Damon Hornet Class C motor home is 30 years old. We bought it from the original owner in 1998, and since then, I’ve become somewhat of a de facto expert on RV repair, simply because I’ve had to fix so many things. The first couple of times I refinished the roof coating, I used a two-part product from Sears. It worked well, but there were little cracks here and there, and there was some water coming in near the front from somewhere. When the roof refused to stay fixed, I decided to give Henry Tropi-Cool a try.
Henry recommends their product for EDPM roofs that are still in pretty good shape. If the roof was in bad shape I would have chosen Dicor products, but I hadn’t let the roof deteriorate too far.
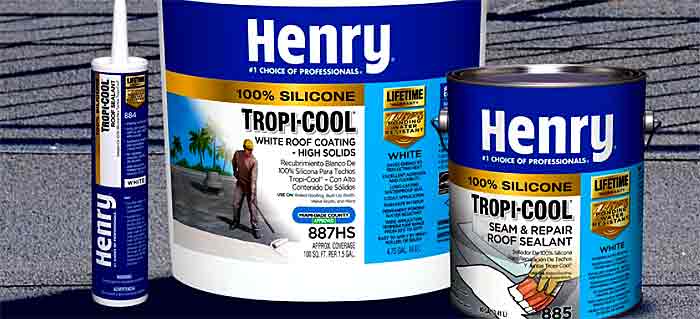
Henry Tropi-Cool is a silicone-based product that cures without solvents by pulling moisture out of the air. It’s safe for EPDM roofing, unlike Flex Seal that will dissolve the EPDM material. I know the guy on the commercial makes Flex Seal look like the best product in the world but I wouldn’t use it.
Henry Tropi-Cool is said to reflect about 86% of the sun’s UV rays, keeping the inside of my RV cooler. That never hurts.
I purchased a 5-gallon bucket of Henry Tropi-Cool from The Home Depot for $395.00. I didn’t need that much, but the cost per gallon (at that time) was $125.00, and I estimated this would take a bit more than three gallons. I hate running short in the middle of the final coating.
Henry Tropi-Cool is also available from Amazon.com. Unless you have Prime, the shipping cost would probably be ridiculous.
Surface Preparation
The Henry Tropi-Cool instructions recommend using a high-pressure sprayer with TSP (shown in the sidebar). This would have required covering the sides of the RV with plastic sheeting, as TSP can remove the paint. A high-pressure sprayer can also inject water into every crack, which might not dry out completely before application. It is a good idea if your roof has algae growth or is black and pitted.
I had done the TSP business on previous roof coatings. But afternoon storms were in the offing, and I just wasn’t inclined work that hard.
My roof wasn’t very dirty, so I used a stiff bristle brush with just enough water to float the dirt, then quickly dried with a towel. I think that did a good enough job of removing the dirt, dried-on bird poop, and chalky grime. Time will tell.
I let it dry for several hours.
Henry Tropi-Cool Application
An RV roof can get very hot in the sun and the product can dry too quickly. The wide application temperature range is between 35° and 120° F, which is good for an RV roof in direct sunlight.
It was a cool morning, but I still wore knee pads to prevent burns. It was safest for me to sit down and move around on my butt to avoid falling off the roof or accidentally stepping through a vent cover. I actually worked barefoot because I just knew I would step in it at some point. I stood up only to do the rolling part.
Note: Wear sunglasses and a hat even if it cloudy. This coating is super bright and will reflect the sun into your eyes strongly.
Tools I Used to Apply Henry Tropi-Cool RV Roof Coating

- 5-gallon bucket lid with pour spout
- Paint stirring attachment for my drill
- Smaller paint bucket (1 gallon) with lid
- Paint roller
- Paint roller brushes
- Paint roller tray
- Paint roller tray disposable insert”
- Paint Roller Extension Pole
- 4″ Paint Brush
Getting the product and tools up onto the roof
A 5-gallon bucket weighs 55 lbs, which is quite a lift for me. So I purchased a 1-gallon bucket and a tight lid and poured some Tropi-Cool into the smaller bucket, making it easier to hoist up to the RV roof. I changed out the 5-gallon bucket lid for one with a pour spout to make it easier to pour and easier to reseal.
The product had separated, and I found about an inch of water on the top of the bucket requiring a lot of stirring. I used a paint mixer attachment on my drill to get it well mixed.
A 10′ ladder helped me get the product and brush up onto the roof, then I climbed up the ladder on the back of the RV.

Starting with a 4″ brush, I painted around the railing, TV antenna, corners, and edges.
 I also painted around the running lights and put a coating over the fiberglass patch I had used to fix a damaged area. See the before and after photo on the right. It looks way better than the nasty fiberglass, and adhered well.
This stuff goes on like thick school glue and it’s slippery (I did end up stepping in it). The instructions say you can use a paint sprayer but what a cleanup nightmare that would be.
I recommend having two brushes on hand (one for each coat) so you can toss it out at the end of the day rather than trying to clean it. I used a roller to apply a thick coating to the wide flat spots.
Cure and re-coat time
Henry Tropi-Cool requires 2-6 hours to cure before a second coat. It should stay dry for at least an hour before getting rained on. They say this can be done in one coat, but I’ve never seen a roof coat that didn’t need two coats so tomorrow I’d be applying a second coat.
Applying the second coat

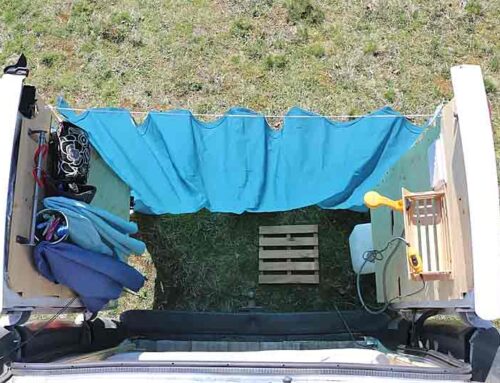
The roof was wet in the morning. Water had beaded up nicely all over, but it was very slippery. I dried with towels the best I could, but it still took hours to completely air-dry. Then I applied the second coat using a fresh brush, roller refill, and roller tray insert.
I went a little crazy and coated the air conditioner cover as well as the refrigerator vent. Both were cracked and brittle, so I’m hoping this thick cover will help them last a bit longer.
Users Complaints
One complaint most often heard it that dirt readily sticks to the coating. I just looked at mine after a week, having driven 50 miles on an unpaved, badly washboarded and dusty road, and you can see where the dust has collected where water has pooled. The coating is extremely white so every bit of dust is easy to see by contrast, but it was easy to wipe off.
Other Uses for Henry, TropiCool

The vinyl cover of my hot tub deteriorated in the sun. I coated it with the leftover Henry, Tropicool. When I opened the mostly used container a year after doing my motor home’s roof the product was is perfect condition. It just needed to be stirred.
I applied Eternabond™ Tape to all the seams first because the stitching had pretty much dissolved and I wanted the tape to hold the sections together. I used a 2″ rubber roller to press it down hard to make the best connection. It really stuck well. Finally two coats of Henry, TropiCool.
The result: It’s sealed up tight. However, it did make it much heavier. Not too heavy but noticeably heavier. One year later it’s still good except some places over the Eternabond™ tape are peeling off. It does not stick to Eternabond. Also, it does attract dust like a magnet. But other than that I’m pleased that is extending the life of my hot tub cover.
Other pages of Tiny Life Consulting you may be interested in:
How to refinish or repair your RV Roof


Leave A Comment